Site-wide Documents
Set-up Guide
Adding robust full‑text search to a Ghost site takes only a few minutes with Visiting Objects Smart Search for Ghost. Follow the steps below to set up your new search experience.
Prerequisites
- ✓ Ghost v5 running at a public URL (self‑hosted or Ghost Pro).
- ✓ Access to the Ghost admin panel with permission to create Custom Integrations (required for API keys).
- ✓ A Visiting Objects account with an active Smart Search for Ghost plan.
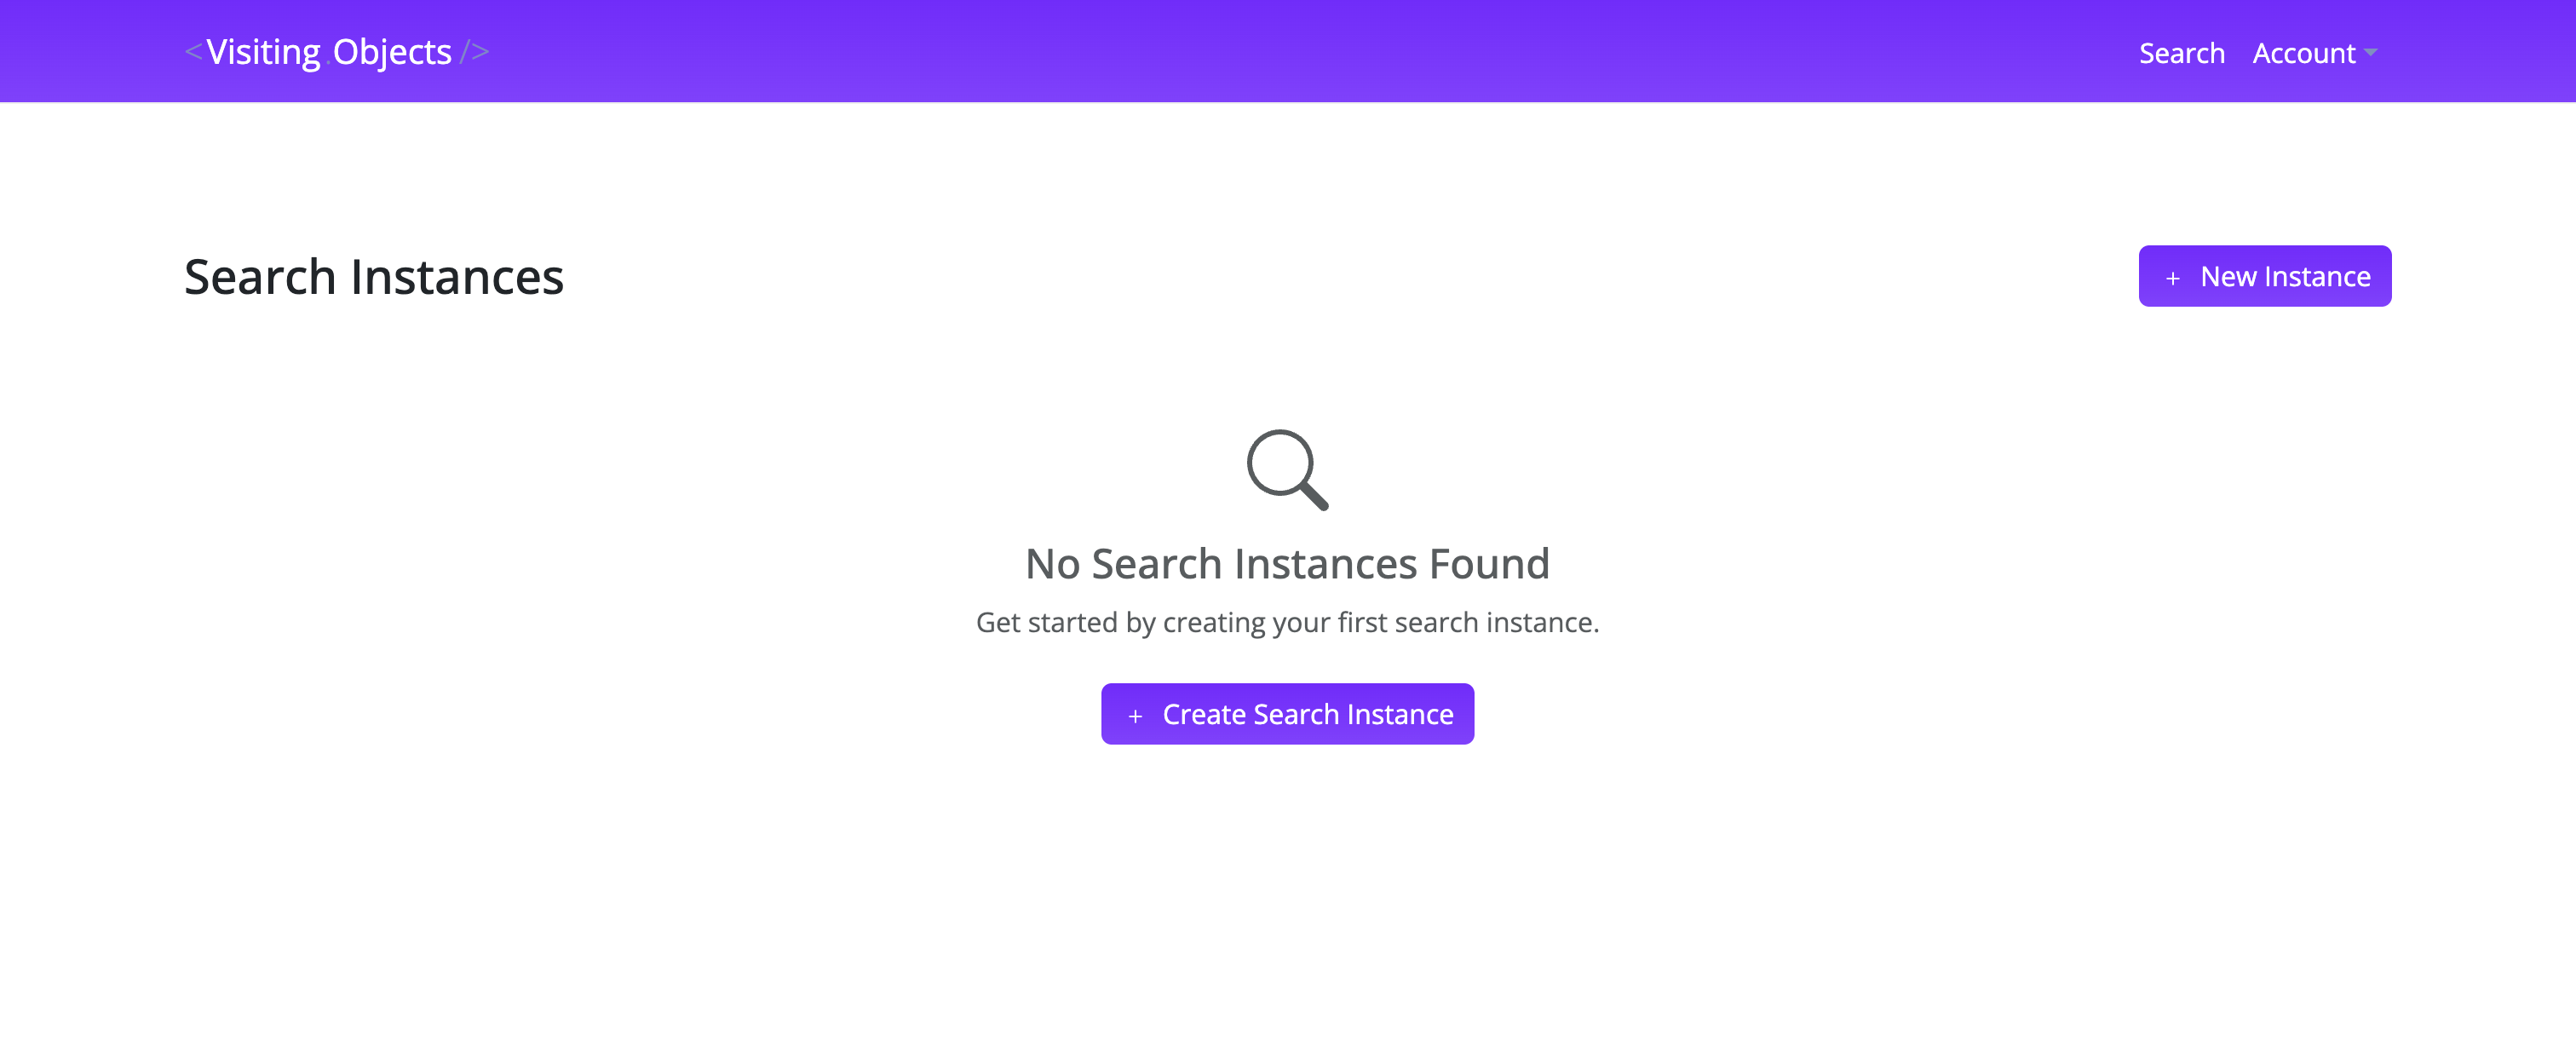
Step 1: Create a new Search Instance
- Log in to the Visiting Objects dashboard and navigate to the Search Instances page.
- Click + Create Search Instance or + New Instance.
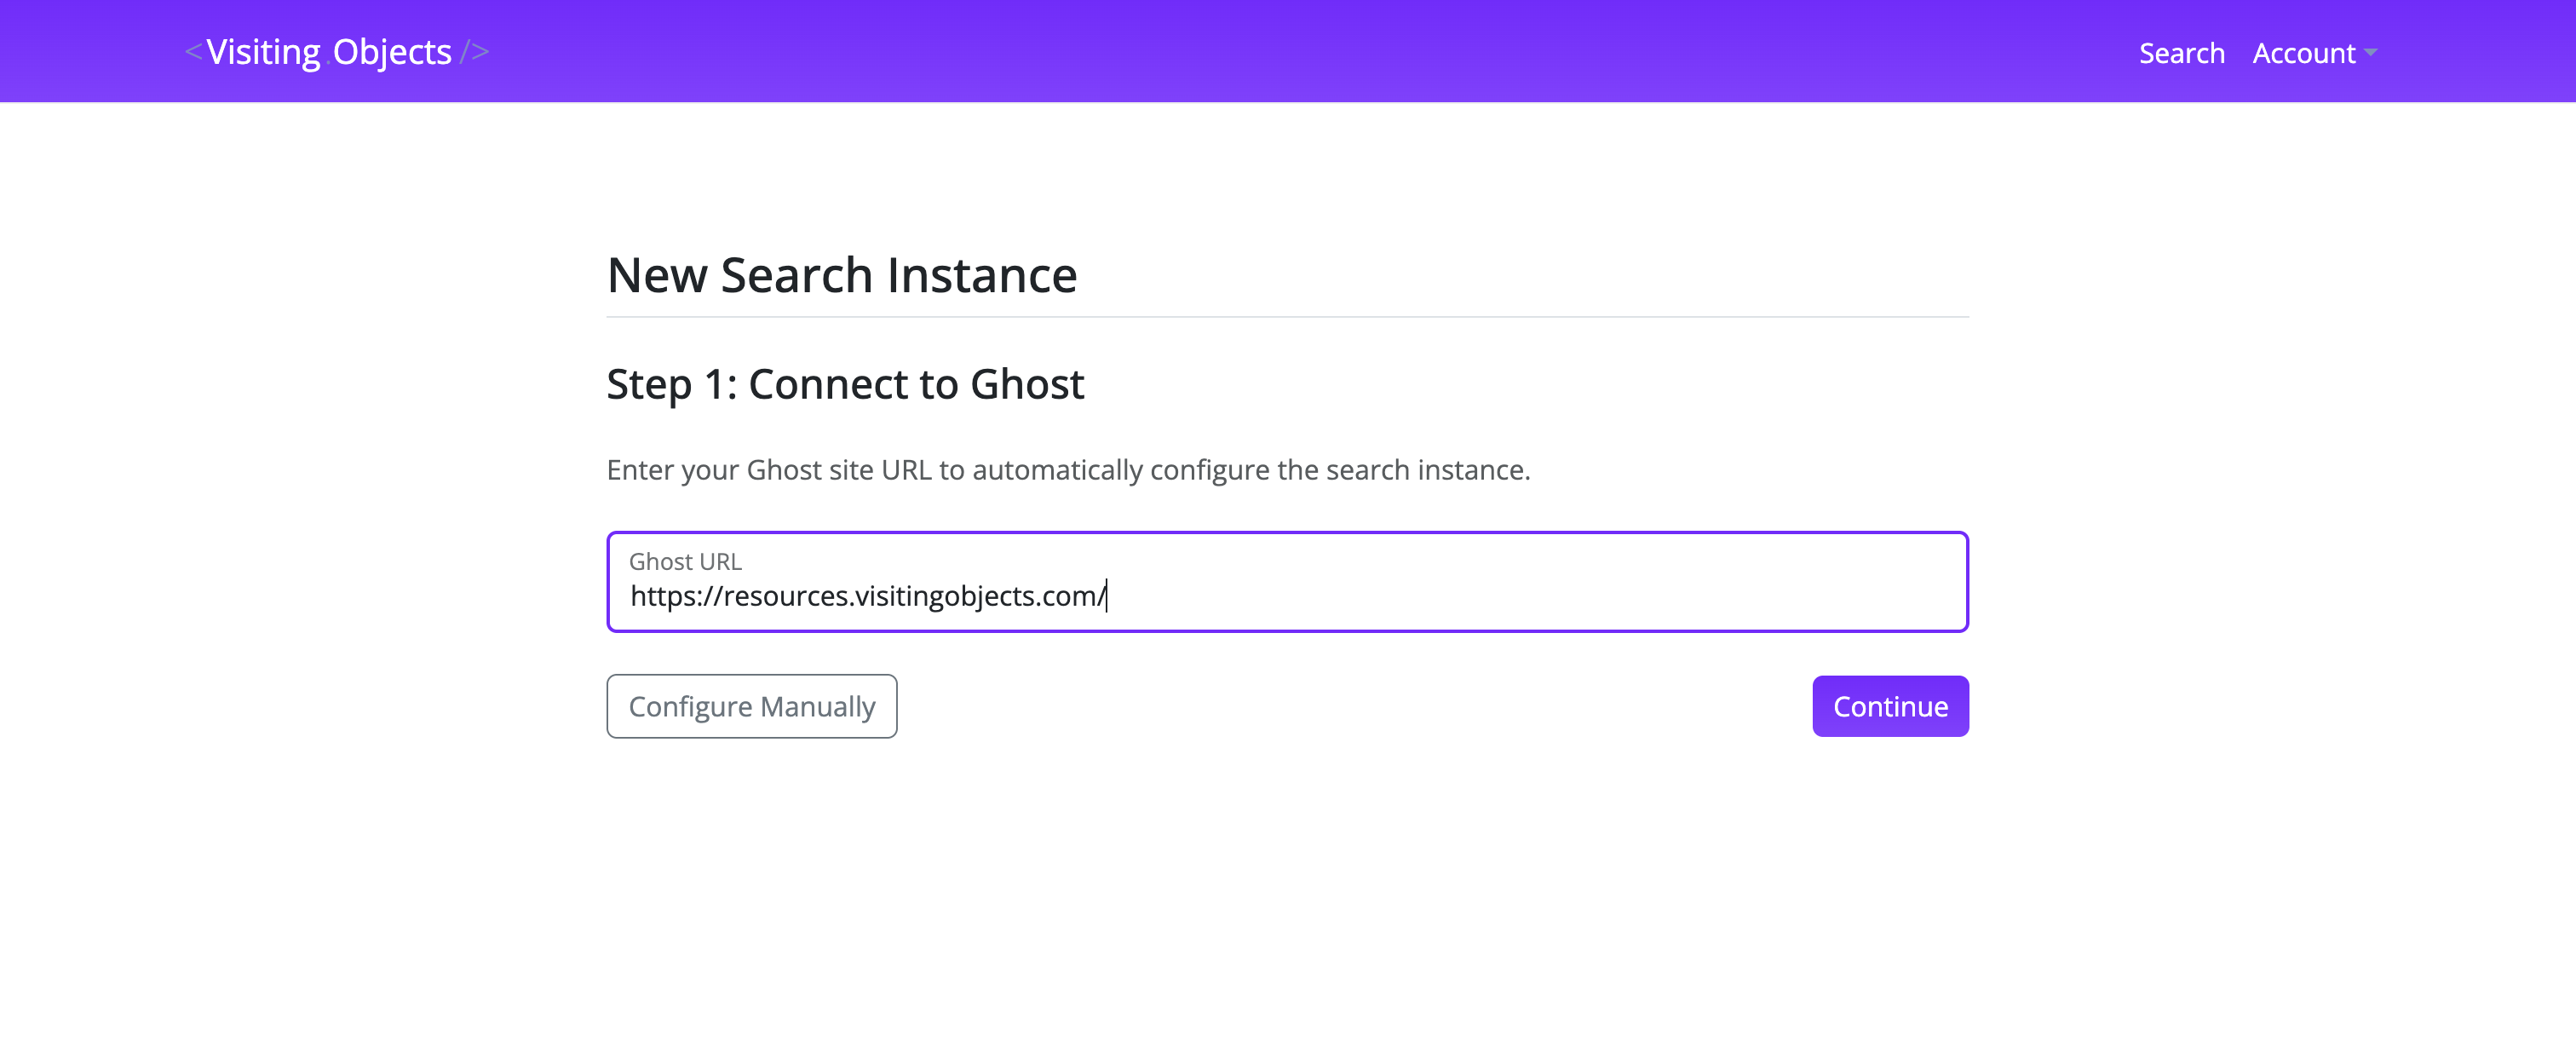
Step 2: Enter the Ghost site URL
- In Ghost URL, enter the full site address, including
https://(for examplehttps://resources.visitingobjects.com). - Click Continue.
- Visiting Objects automatically scans your Ghost instance and pre-fills everything it can, from your site name and accent color to the API URL and indexing configuration.
Step 3: Provide API keys
The only manual input usually required is the two API keys:
| Key | Where to find it in Ghost | Purpose |
|---|---|---|
| Content API Key | Settings › Integrations › Add custom integration | Read published posts and pages for indexing |
| Admin API Key | Same custom integration card ("Admin API Key") | Register webhooks so new or updated content is indexed automatically |
- Paste both keys in the New Search Instance form.
- Optional adjustments:
- Primary Accent Color – UI accent (defaults to the color detected on the site).
- Modal Trigger Icon Color – color of the search icon added to the theme.
- Indexing Filters – enable tag‑based inclusion rules if only specific content should be searchable.
- Click Create.

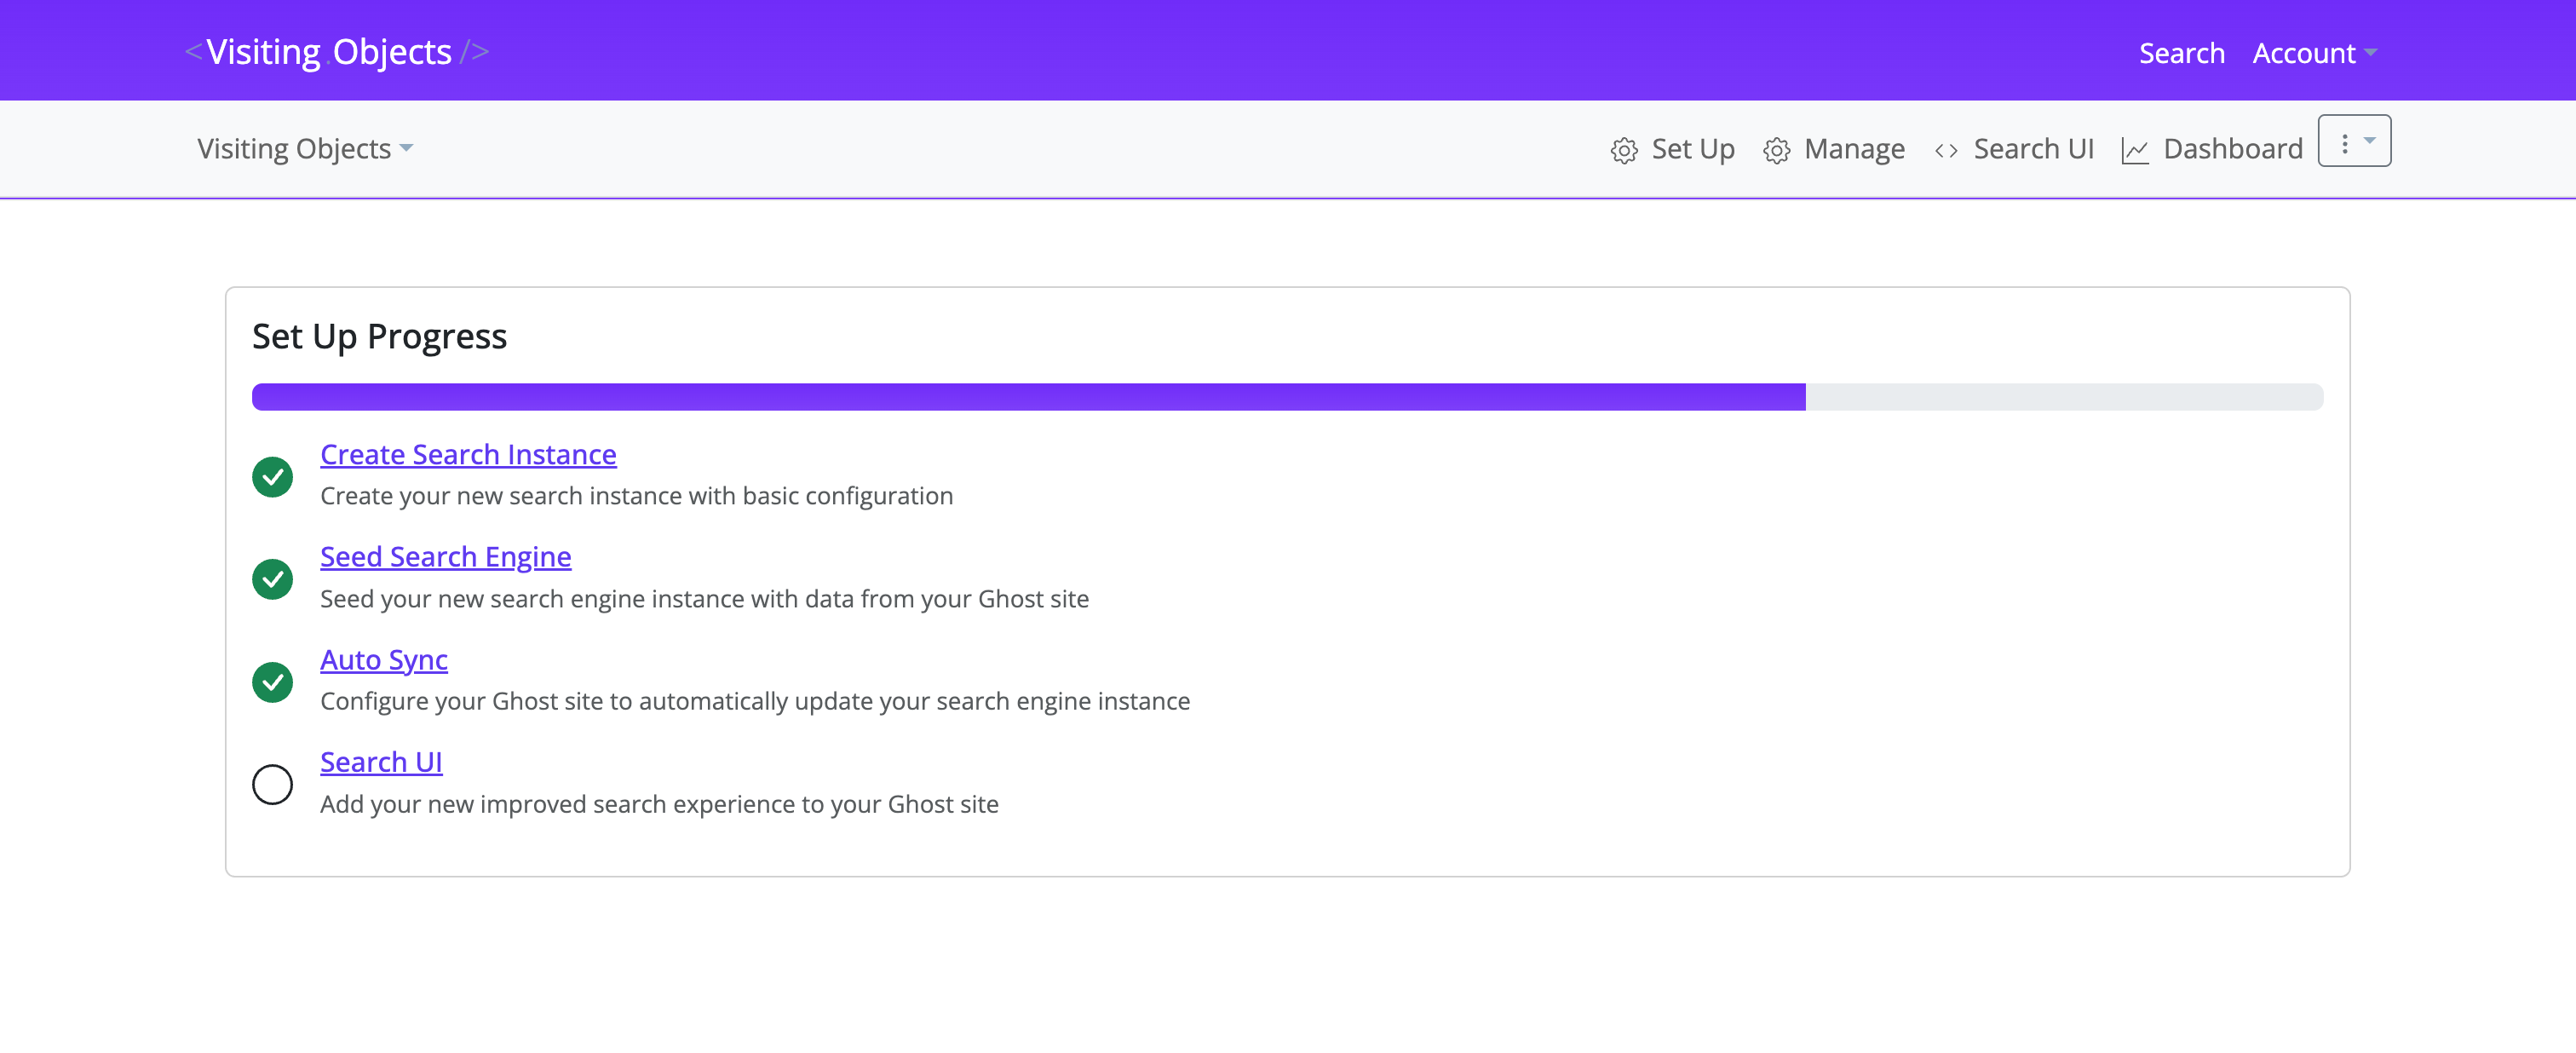
Step 4: Watch the set‑up progress
A progress panel tracks four automated jobs.
| Task | Description |
|---|---|
| Create Search Instance | Allocates a managed search engine for the site |
| Seed Search Engine | Imports all existing posts and pages (may run for several minutes on large sites) |
| Auto Sync | Registers update webhooks via the Admin API |
| Search UI | Builds the customized front‑end bundle |
ℹ️ You can leave the page; processing continues in the background.
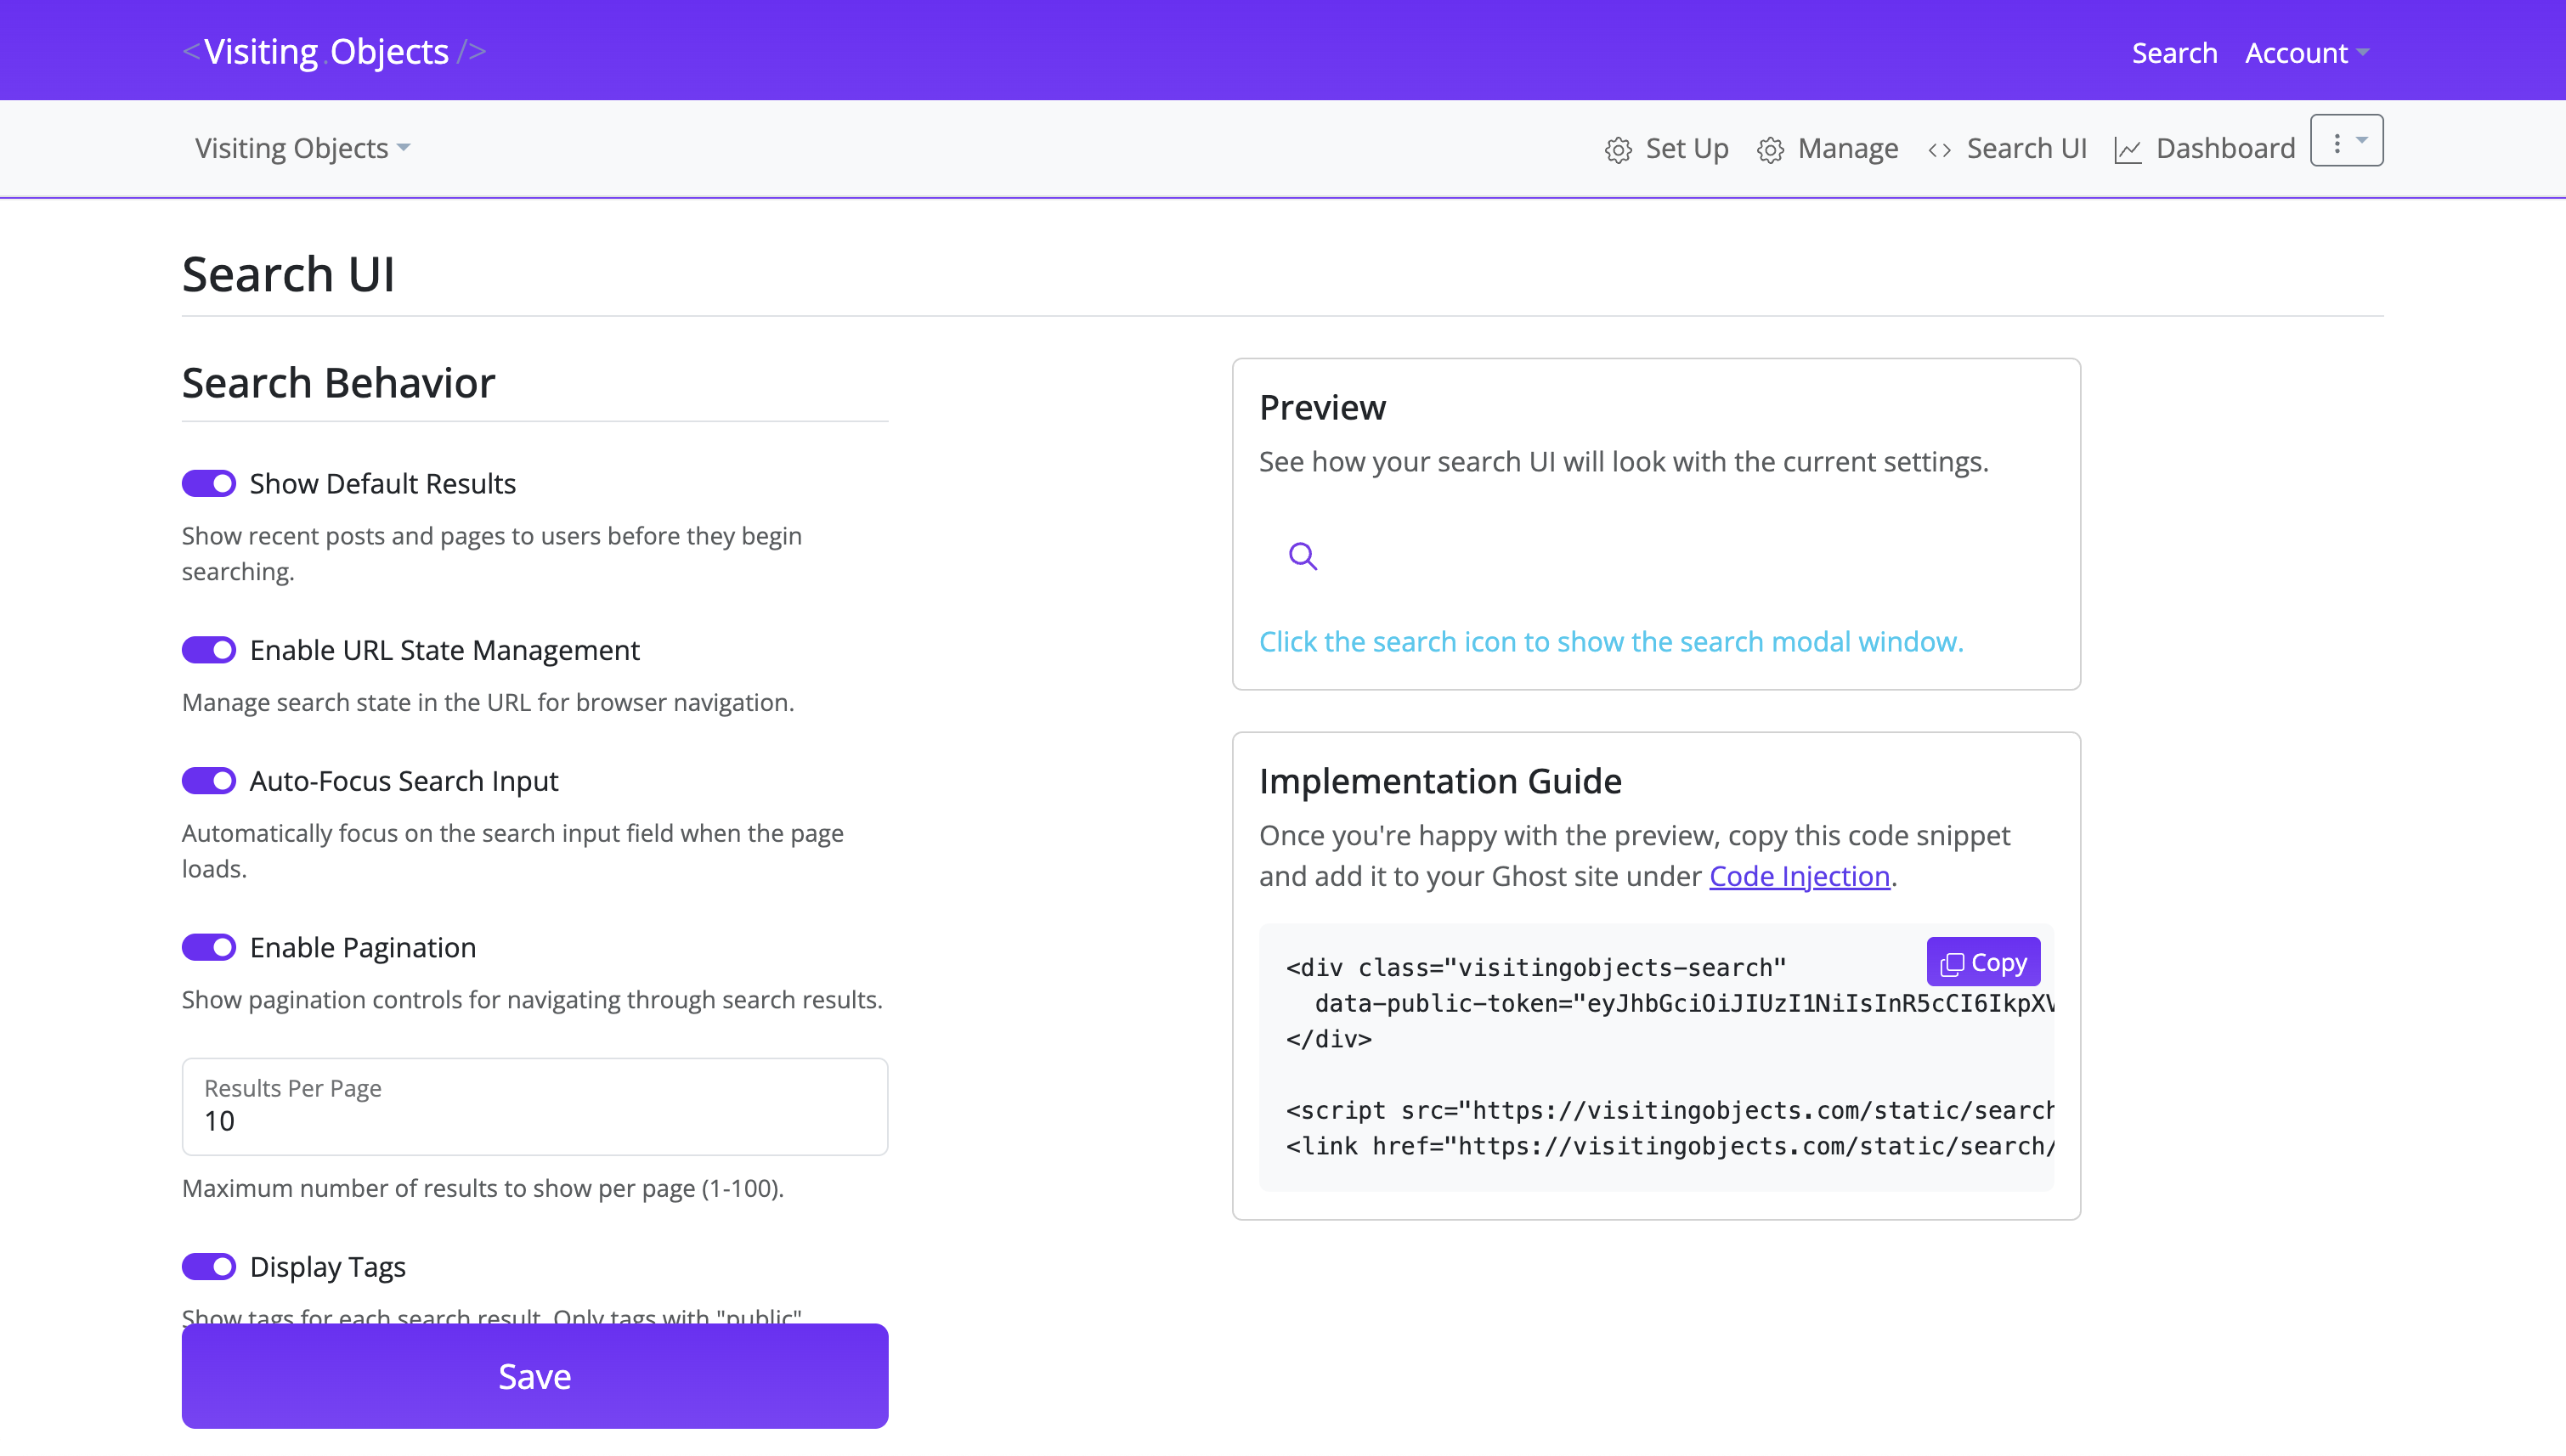
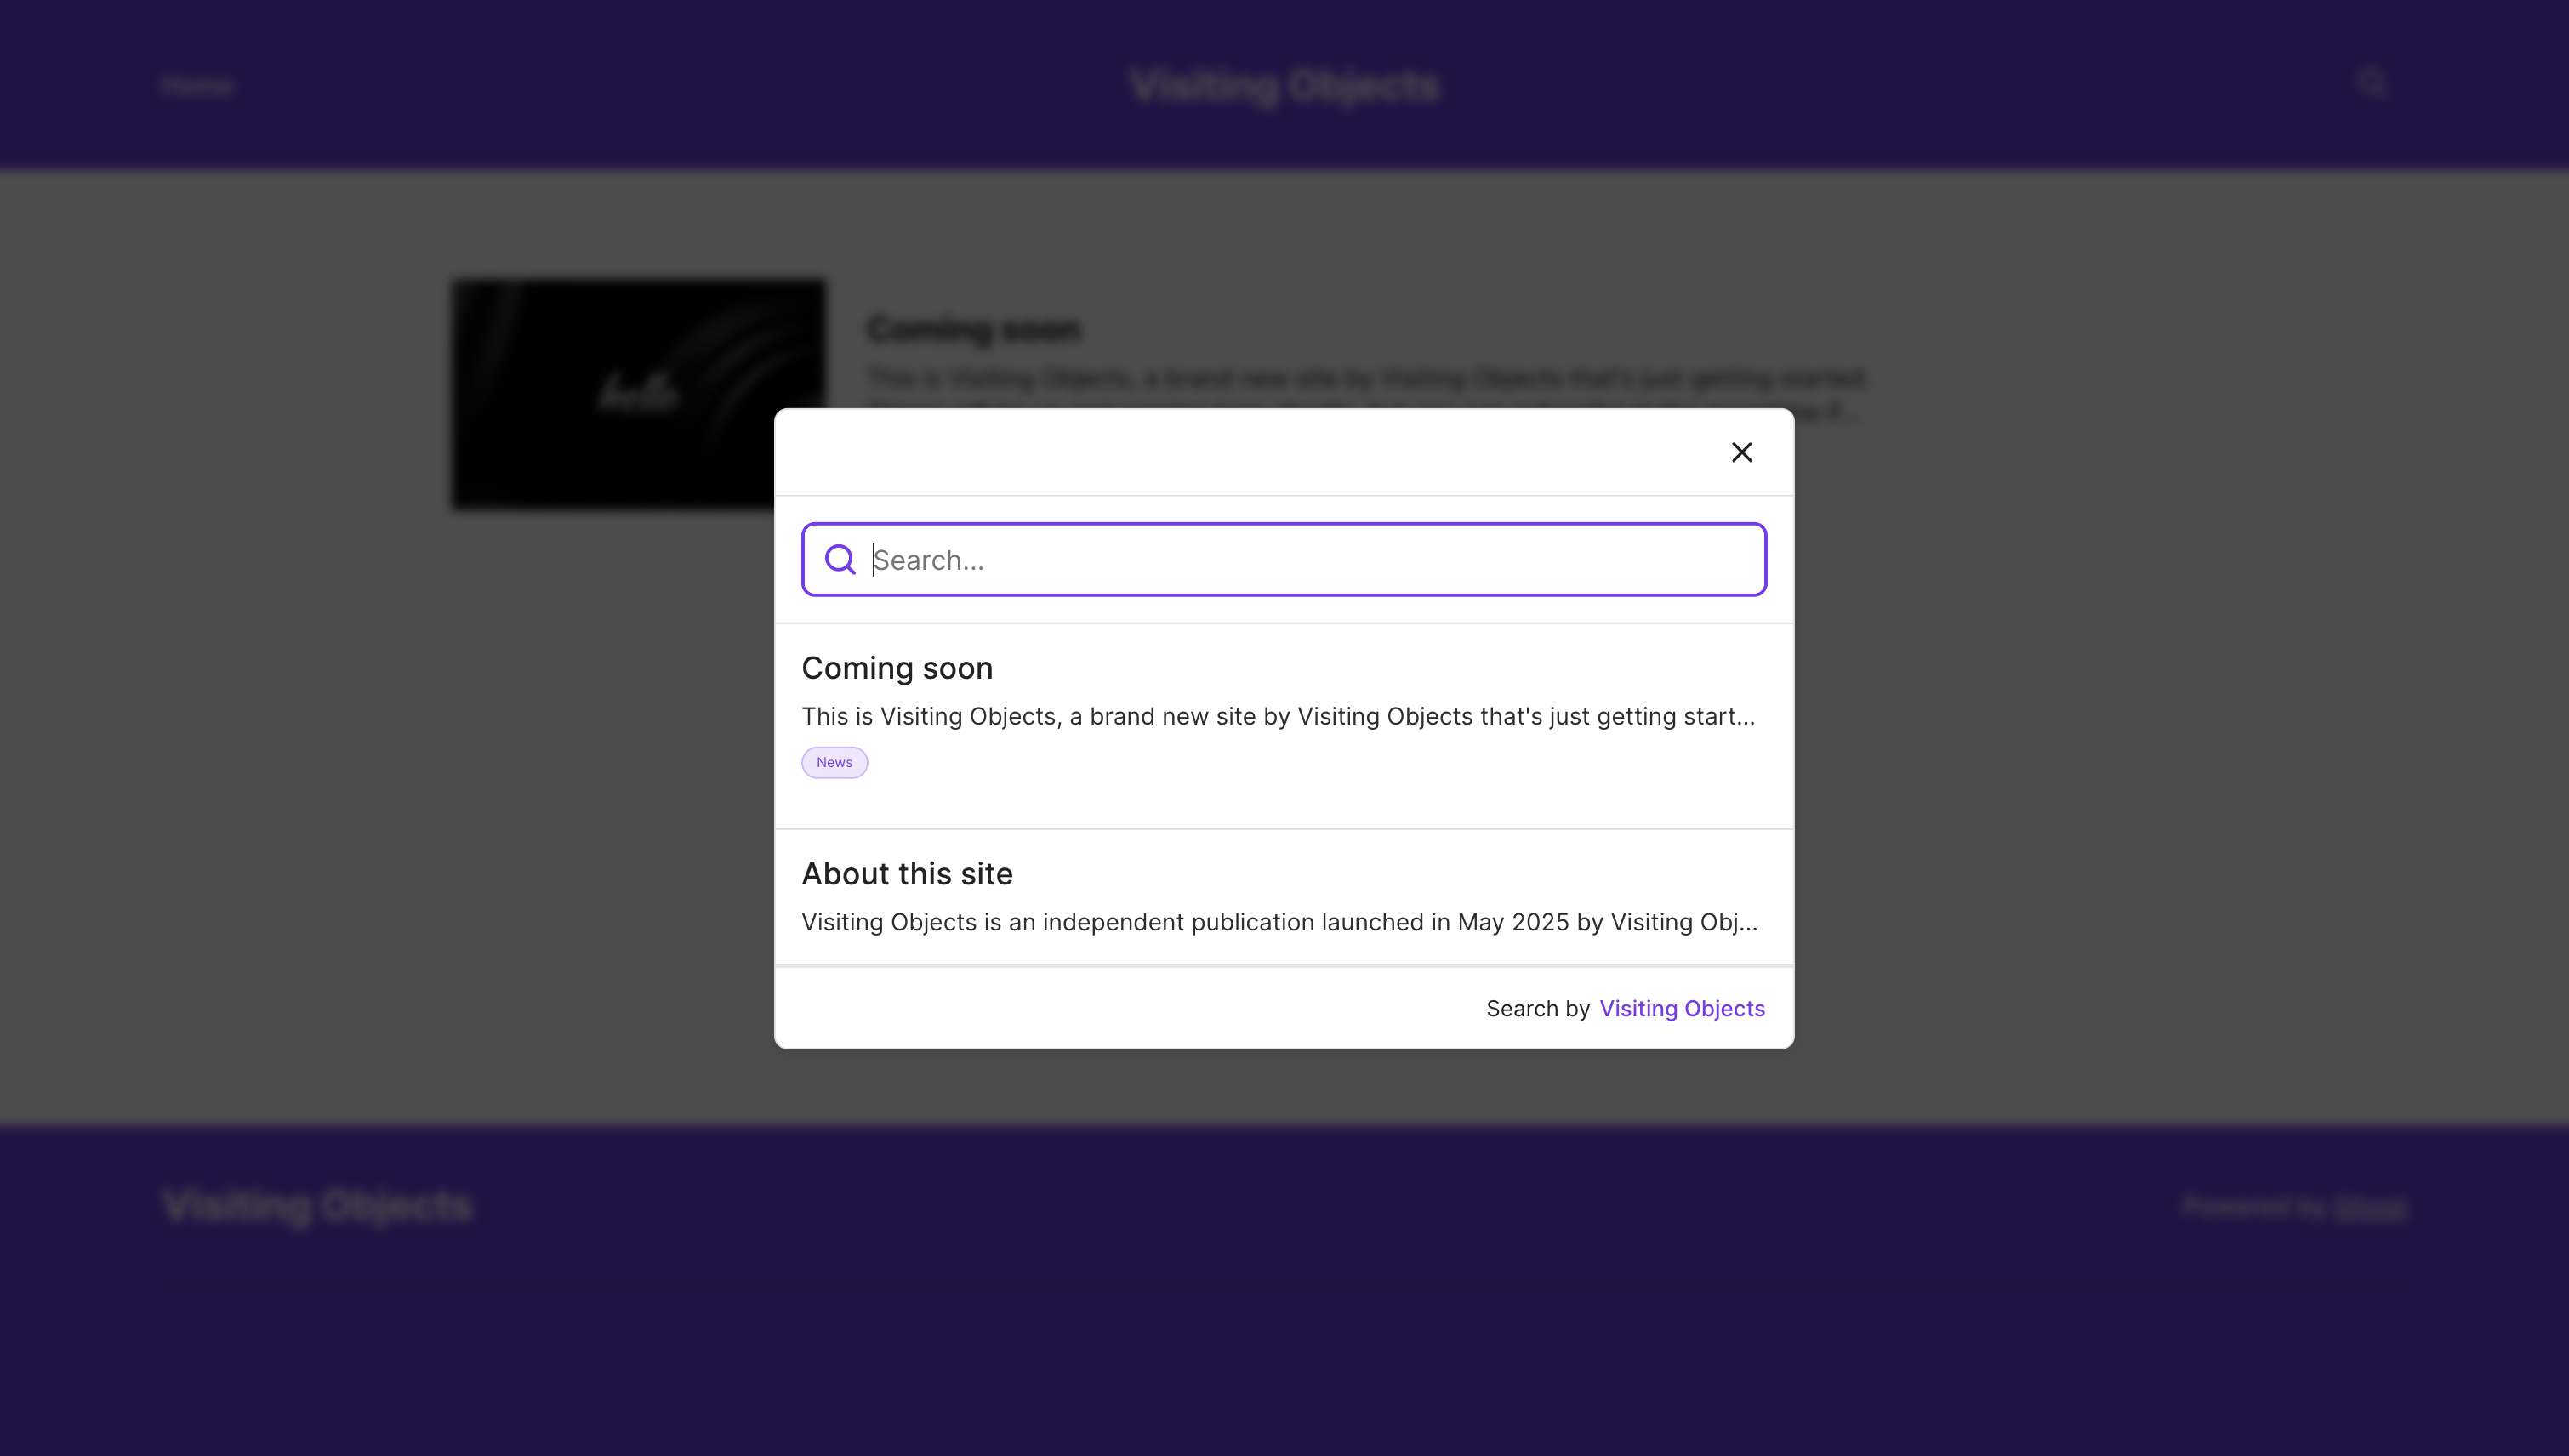
Step 5: Embed the Search UI
When all tasks are marked complete, open Search UI in the left navigation.
- Review the behavior options (default results, autofocus, pagination, etc.) and the live preview.
- Click Copy in the Implementation Guide box to copy the snippet.
<div class="visitingobjects-search"
  data-public-token="REPLACE_WITH_YOUR_TOKEN"></div>
<script src="https://visitingobjects.com/static/search/vo-search.js"></script>
<link href="https://visitingobjects.com/static/search/vo-search.css" rel="stylesheet">
- In Ghost Admin open Settings › Code Injection › Site Header and paste the snippet.
- Click Save.
✓ The script injects a search icon into compatible Ghost themes. Additional triggers can be bound manually (see details on the search UI page).
Step 6: Verify the new search experience
- Visit the live site and click the search icon (usually in the header).
- Type a few queries and confirm results load instantly.
- Edit or publish a post in Ghost, then search for its title to confirm automatic syncing.
Troubleshooting
| Symptom | Likely cause | Resolution |
|---|---|---|
| Search icon not visible | Modal Trigger Icon Color matches header background | Choose a contrasting icon color and click Save |
| No results returned | Content API key invalid | Regenerate the key in Ghost and update the instance |
| New posts not searchable | Admin API key missing or webhook disabled | Add a valid Admin API key, or choose "Set Up Manually" and follow the instructions to maintain this aspect of the integration manually |
Support
Email support@visitingobjects.com with your site URL and a short description of the issue. Attach screenshots or logs where possible to speed up resolution.
← Back to Smart Search for Ghostx | Need help? Contact Support